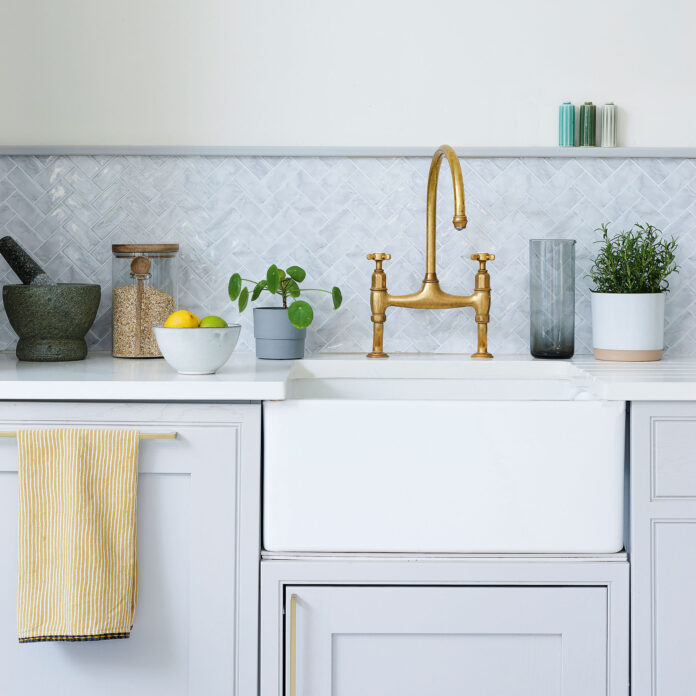
It’s the finishing touch every kitchen needs, that will not only protect your wall from the inevitable splashes of washing up, but will also add colour and pattern to your scheme. Follow our guide on how to tile a kitchen splashback and you’ll be armed with the knowledge and know-how to do it yourself, without having to fork out for professional labour costs.
There are plenty of kitchen tile ideas to inspire the look of your kitchen, and while we don’t necessarily advise you tackle the whole room if you’ve not tried tiling before, tiling your kitchen splashback is a good place to start, to gain practise.
Your splashback doesn’t have to be huge, just big enough to protect the wall behind your sink or oven plus inject some interest to the room.
For a simple yet stylish splashback, we’d recommend using metro tiles. Not only are they reasonably cheap, their simple shape means they are much easier to tesselate and there is less that can go wrong! That said, once you get more confident with your tiling technique, there is no reason why you can tackle a more exciting shape, like a hexagon, diamond or scalloped-fishtail shape.
How to tile a kitchen splashback
Image credit: Future Plc/Joanna Henderson
Kitchen splashbacks can be as low or as high as you like. Some are only the height of a single row of tiles, some take the tiles up to meet the bottom of kitchen cupboards and some continue the tiles right up to where the wall meets the ceiling. There is no right or wrong but it is personal choice and will be determined by the look you want to go for in your own kitchen.
While installing a kitchen splashback can sometimes be seen as an easier alternative, learning to tile one instead, will arm you with the skills to tile other areas of your home, such as your bathroom or ensuite. A tiled splashback is often cheaper too, as stainless steel or glass splashbacks can be pricey, especially if they have to be pre-cut to size.
Set aside a full day if you can, to leave time for prep, drying and the clean up, so you don’t feel rushed or stressed to complete your splashback in a certain time.
What you’ll need
Dust sheets or newspaper to protect your work surfaces
Tile adhesive
A notch trowel
A tile cutter
Tile spacers
A pencil
A measuring tape
A spirit level
Your chosen tiles
Your chosen grout
1. Prep your wall
After covering your work surface and sink with dust sheets or some newspaper, start by prepping your wall surface. Remove any dirt and dust with a damp cloth, and fill in any holes or dents to ensure a smooth, level finish. Give any rough areas a gentle sand then wipe with a damp cloth again to leave to dry.
2. Apply the adhesive
Next apply your tile adhesive to the wall, using a notch trowel. Start at the base of the wall, where it meets the countertop, and only apply what you need for the first layer of your tiles. Apply a generous amount but not so much that it starts to run off the wall and ensure it’s as even as possible. Use the notch trowel to create horizontal lines across your wall.
Image credit: Future Plc/Lizzie Orme
3. Start tiling!
Once you are happy with application of the adhesive, start by placing your first tile on the wall. Apply each tile with firm pressure to stick them to your adhesive and use tile spacers between each one to ensure perfect unity. You’ll need a tile spacer (or two if your metro tiles are quite wide) between each side of the tile, but with your first row you might want to butt them up against the top of the work surface. You can cover this join with mastic later.
Working from one side to the other, apply the next tile in the row, inserting the spacers as you go. Think about what formation you want your tiles in too. A simple linear brick formation is the easiest, but you could opt for the very popular brick bond, or a staggered brick bond, or even a herringbone pattern to add real interest.
Image credit: Future Plc/Lizzie Orme
4. Cut your tiles to size
Once you get to the end of your first row, you’ll probably find you need to cut a tile to fit into the remaining space. Use a measuring tape and mark on the tile with a pencil, where you need to cut it. Take the tile spacer into consideration then using a tile cutter, score a line along the tile and apply light pressure to break the tile along the score.
Once you’ve finished your first row, use a spirit level to check they are all perfectly horizontal, adjusting them slightly if not.
Then apply your adhesive above the row you have just finished, and start the process again, not forgetting the tile spacers!
5. Grout your tiles to finish
Once you have completed tiling your splashback, do a final check that they are all level, then remove all the spacers. Wipe off any excess adhesive with a damp cloth, then mix up your grout. For a subtle look, choose a grout the same colour as your tiles, or for a contrasting look, opt for black or grey. Follow our handy guide on how to grout tiles to finish your tiling off perfectly.
Image credit: Future Plc/Colin Poole
Where do you start tiling a kitchen splashback?
Always start your tiling at the base of the wall, where it meets the work surface. Depending on while tile formation you choose, you could either start on the far left hand-side of the wall, working your way to the right (or vice versa) or you might want to start in the middle of the wall, working your way outwards. Think about where your eye would naturally be drawn to and if your tiles have a strong pattern, make sure they won’t get cut off at an awkward point in the room.
Is it easy to tile a kitchen splashback?
Yes, but it does depend on how much DIY experience you have. If you’re not feeling too confident, why not practise on a piece or left over MDF, tile board or plywood. Have a go at applying the adhesive with the notch trowel and the experiment with the layout of the tiles. Or alternatively, cut some pieces of paper or cardboard into tiles and experiment with these first.
How long does it take to tile a kitchen splashback?
Always allow yourself plenty of time, but depending on the size of your splashback, it could take as little as an afternoon. Preparation is key, so ensure you have all the correct tools and means to protect surfaces, before you begin. It’s worth investing in a tile cutter as it will be very hard to cut them by hand, so have a search on a second-hand site or ask friends and family if you can borrow one, before you get started.
For a super simple splashback that would only take a couple of hours, tile a single row of square tiles just the width of your kitchen sink. You don’t even have to leave gaps inbetween each tile if you don’t want to,
The post How to tile a kitchen splashback- a step-by-step guide appeared first on Ideal Home.


